• Site Map
  • Contact Me
  • About Me

Pat's Cross-Stitch Corner

A Place to Share a Craft I Love

Love you to the Moon and Back

March 14, 2014 By patgeary

moon-and-back-chart

When I first saw this chart, I Love You to the Moon and Back by Waxing Moon Designs, it made me think of my oldest son, Frank and his wife, Alana and what they always said to each other. Frank lost his battle with cancer on December 28, 2011. He had just turned fifty. I decided to stitch it for Alana in his memory and in appreciation of the care she gave him during that final year. The suggested fabric was a hand-dyed linen that was a dark blue. Aida fabric was also offered in that same color. I ordered a piece and tried to stitch but had such difficult seeing the holes, I had to change to a lighter shade of blue. I also chose to use DMC floss rather than the Crescent Colors suggested. I also ordered the button that goes in the upper left hand corner.

Again someone on the 123Stitch Message Board loaned me the chart. While the lighter shade of blue was easier to stitch, my old eyes still had a difficult time.

moon-finished

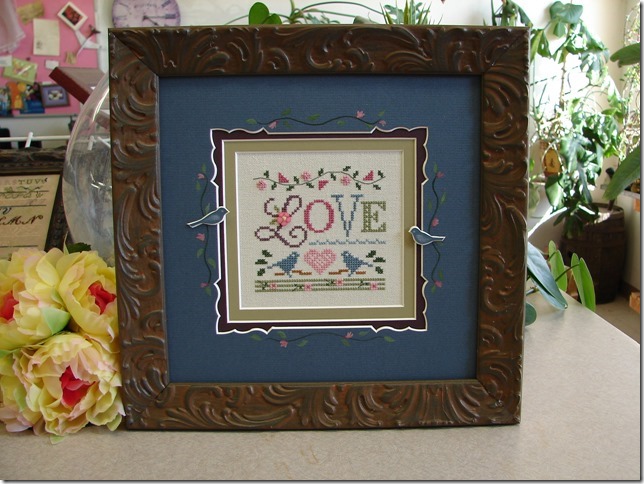
As you can see by the picture shown above, I decided to personalize the finished piece with Alana and Frank’s names stitched below the verse. I tried various frames with the piece but could not really make up my mind and was not real happy with how any of them looked. I had seen some of the finishing techniques on the message board done by ClaudiaB and decided to give her a try. I sent her the piece and told her I wanted it finished as a cube. This style of finishing was entirely new to me but I loved the finished piece. See what you think.

i-love-you-finished-sm

I have mailed it to my daughter-in-law and hope she is as happy with it as I am.

Filed Under: Pictures

A Little Love by Lizzie Kate

March 14, 2014 By patgeary

a-little-love

When I first saw a photo of A Little Love by Lizzie Kate, I knew it was the perfect project to stitch for my husband’s 100th birthday. I did not want to order the kit because I do not like stitching on linen so posted to the 123Stitch Message Board. Someone on the Board had just finished stitching it and was willing to sell me just the chart for $5 which included postage. Rather than use the recommended floss, I chose to use DMC because I already had all the colors on hand. I ordered the small flower button that had been a part of the kit and I already had some small rose colored beads. For the fabric I chose a piece of 28 ct antique white probably lugana but not sure since it came from another kit. It was a fairly quick stitch but I had to work on it at night after Jim was in bed so he would not see it.

Pictured below the background is actually white although it does not look like it.  I normally stretch and frame my own work but since this is for a very special man on a very special occasion, I am sending it off to Jill Rensel to work her magic on. I’ll post a picture once I get it back.
love-3-14-2014

The finished piece framed by Rensel Studios I will give it to Jim as soon as it is delivered rather than wait for his birthday.

A Little Love framed by Jill Rensel.

A Little Love framed by Jill Rensel

Filed Under: Pictures

Loose Feathers – Summer, Autumn, and Winter

March 7, 2014 By patgeary

Someone on the 123Stitch Message Board recently posted the Loose Feathers Summer, Autumn, and Winter by Blackbird Designs as a WIP’s. I saw it and wanted to stitch it so went looking for the charts. I was lucky enough to be able to purchase the three separate charts  from another board member. You can see the completed piece on the back of the Winter chart. It is the one pictured at the bottom left of the chart.

Loose Feathers Winter by Blackbird Designs.

I choose a piece of 28 count cream Monaco that was large enough and that I already had as my fabric and thought about using DMC floss for the project since that is what I have on hand. After some discussion, I decided to go ahead and purchase the recommended Gentle Arts Sampler Threads and Crescent Colors thread. Crescent Colors is now known as Classic Colorworks.

Stitch Count: 222w x137h
Design Size: 15 7/8 x 9 3/4 (28/14ct)
Fabric Size: 22 1/2 x 16 1/2 (28/14ct)

I decided to grid my fabric for this project but found it was much harder doing this on 28 count fabric versus 14 count Aida which I had previously done for the Wolf Pack I was stitching for my son. The holes are so much smaller!

The fabric is ready, the charts have arrived so now I am waiting for the floss so that I can add this project to my rotation. This is what the finished project should look like when completed.

Loose Feathers Summer, Autumn, and Winter by Blackbird Designs..

The project is actually three separate pieces stitched horizontally as one piece. I am looking forward to working with this new floss. You can read more about working with the Sampler thread.

I’ll be posting pictures as the project progresses so come back to visit often.

March 15, 2014 – The last of the floss for this project just arrived so it is now time to begin. I’m going to check with folks on the 123Stitch Message Board wants to join me in a SAL.

NOTE: Besides the recommended floss, you will need one additional skein each of Manor Red, Piney Woods, Endive, Maple Syrup.

loose-feathers1

Loose Feathers - Summer.

Loose Feathers – Summer – Progress as of 3/28/2014

Loose Feathers Progress 4-18-2014.

Loose Feathers Progress 4-18-2014

Progress as of May 2, 2914

Blackbird Designs - Loose Feathers

Blackbird Designs – Loose Feathers 5-2-2014

Progress as of May 24, 2014

Blackbird Designs - Loose Feathers - Progress May 24 2014

Blackbird Designs – Loose Feathers – Progress May 24 2014

Progress on May 30 2014

BD Loose Feathers as of May 30 2014.

Blackbird Designs Loose Feathers as of May 30 2014.

Progress July 6, 2014
Unfortunately, I ran out of GAST Piney Woods so progress has stopped until my next order from 123Stitch arrives. Not much left to go.

Blackbird Designs Loose Feathers as of 7-6-2014.

Blackbird Designs Loose Feathers as of 7-6-2014

Finished: July 11, 2014

Blackbird Designs Loose Feathers finished stitching.

Blackbird Designs Loose Feathers finished stitching

The frame I ordered arrived today and I could not wait to see how it would look. The piece still needs to be stretched and laced and I need to order the glass but am very happy with it. And the best thing is the frame was on sale for $18.96 (60% off) with an additional 25% off for the weekend.

Blackbird Designs Loose Feathers Framed

Blackbird Designs Loose Feathers Framed

Frame: EWC6 – Deep mahogany, eco-friendly frame with a classic profile. (19 3/4″ x 12 1/2″)

Filed Under: Samplers

Hearts & Holly Mystery Sampler by Lizzie Kate

March 3, 2014 By patgeary

Recently, someone on the 123Stitch Message Board gave me the three charts that make up the Hearts and Holly Mystery Sampler by Lizzie Kate. The suggested fabric was a hand-dyed linen called Doubloon. I don’t particularly like stitching on linen and the fabric was also available as 14 ct Aida so I ordered a piece the required size of 22″ x 13″. I also decided to stitch the three charts using DMC floss since that is what I had. I finished the first chart which is on the far left of the sampler. The three pieces are stitched side by side rather than vertically aligned. The colors are soft and pretty and I am liking the piece. lk-hh2

Since I have a number of pieces that I am working on a rotation cycle, this will be put aside for a couple of weeks while I return to The Wolf Pack. If you are curious as to what the finished Hearts and Holly Sampler will look like when finished, you can see it pictured below or visit the Lizzie Kate website.

lk-hh-sampler

Since the chart was given to me, I will be giving it away free (PIF) to someone on the Board once I have finished stitching it. Come back in a couple of weeks to see my progress.

Progress as of March 22, 2014.  Not much more to stitch and it will be finished.

Hearts & Holly Mystery Sampler by Lizzie Kate.

Hearts & Holly Mystery Sampler by Lizzie Kate.

Last stitch taken on March 29, 2014. I still need to find a small gold heart charm to add and then decide on framing but the stitching is finished.

Hearts and Holly Mystery Sampler Finished.

Hearts and Holly Mystery Sampler Finished

Heart and Holly Mystery Sampler Framed

Heart and Holly Mystery Sampler Framed

Heart and Holly Mystery Sampler Framed

Filed Under: Samplers

Four Seasons by Little House Needleworks

February 13, 2014 By patgeary

I finally put the finishing touches on the bellpull I did using the Little House Needleworks Charts for:

  • Season of Rest
  • Season of Hope
  • Season of Growth
  • Season of Plenty

Rather than stitching each of the charts separately as pillows,  the four charts were stitched vertically on one piece of 16 count antique white Aida and finished with bellpull hardware. Now to find a place to hang it.

four-seasons-bellpull

To stitch either horizontally or vertically as one continuous piece:

77×4 = 308 design

16×3 = 48 between each design

Total = 356 stitches

Design Area = 4 7/8 x 22 1/4 plus whatever you want for a border and finishing.

I probably bought the fabric (Charles Craft) in a tube which would be enough to stitch the four charts  horizontally or vertically.

This was cut wide enough so I just turned the fabric as the backing since I needed it as narrow as possible since my wall space is already covered with large framed cross stitch pieces. When I stitch it again, it would probably be horizontally but since each design is 77×77 the fabric would work the same way.

Filed Under: Finished Works

Gridding your Fabric for Cross Stitch

January 13, 2014 By patgeary

I recently joined the Message Board offered by one of my favorite places for order cross stitch supplies and learned a trick that I wish I had known about many years ago. A bit of history first. I recently started stitching The Wolf Pack for my youngest son. The design uses many shades of grey, black, and blue and I kept getting confused as to where I was. I had read about gridding your fabric as part of a recent thread on the board and thought I might give it a try to see if it worked.

I always mark the center of both the design and fabric when I start stitching and work from the center either up or down. This time I decided to start stitching at the top left-hand corner because of the design itself. See Wolf Pack for more on this particular project. I then counted up 20 lines and added a line of running stitches horizontally every 20 lines just so I could count. Then counted over to where the first stitch would go. I used plain ole sewing thread (red) to mark the lines. Worked OK to start but still kept having difficulty so went back and marked every ten lines horizontally. This helped so decided I needed to know more about marking my fabric in this manner.

NOTE: This would have been much easier to do BEFORE I started stitching then afterwards!!!

Here are some of the links I found that helped:

An Rx for a Worldwide Epidemic | Just One More Stitch (jeanfarishneedleworks.com)

http://www.stitchingthenightaway.com/75/gridding-your-fabric-for-cross-stitch/

http://cross-stitch.livejournal.com/556458.html

http://pinwheelponders.blogspot.ca/2009/01/some-thought-on-stitching-cross-stitch.html (scroll down)

http://www.scarletquince.com/gridding.php

Most of the charts I work on have a darker line every ten stitches both horizontally and vertically. So, this is what I did:

1. Mark the center of the design on the chart and the fabric. Count up to the first darker horizontal line and stitch all the way across your fabric. Repeat in both directions for the entire width of the fabric.

2. Count over to the first dark vertical line and stitch a vertical line the entire height of the fabric.

wolf-gridded

The design so far with what I had stitched and the grids in place.

August 2022 – I have continued to grid my fabric over the years as my eyesight has gotten worse. I now use red fishing line 4 or 6lb test. I also now grid any project large or small.

Filed Under: Tutorials

January Ornament Finish

January 11, 2014 By patgeary

“Peppermint Twist“
Ornament #9

Stitched on 16 ct Khaki Aida. Still needs the candy cane button added but will do that when I decide how to finish it. This is just one of the Little House Needlework Christmas Ornaments I purchased from 123Stitch.com (my favorite on-line site for ordering). Finished piece is much prettier than my picture shows and it is not crooked like the picture. If I could only get the pictures to look as good as the actual piece.

pepermint-twist

February 23, 2015 Back from the finishers!

Peppermint Twist by Little House Needleworks.

Peppermint Twist by Little House Needleworks

Filed Under: Christmas Ornaments, Finished Works

Wolf Pack

January 8, 2014 By patgeary

Progress 1-9-2014

wolf-1-9-2014

wolf-pack-lgI received this chart as a freebie a number of years ago when I placed an order for Sunshine and Sunflowers from Janlynn. It has been languishing in my stash basket since then. I asked my youngest son, Michael if he would like me to stitch it for him. “Yes,” he says. With a stitch count of 100W x 295H I knew it might be a fairly large size. Rather than use 14 ct which was what was recommended, I decided to use 16 ct antique white Aida which I ordered from my favorite source 123Stitch.com. The finished size of just the design area would be 6 1/4” by 18 1/2”

Little did I realize how many shades of gray were used. Ten shades for just the top left part of his ear!! But it is going to be beautiful when finished.

Started stitching: Jan 6, 2014.


Wolf Pack 1-20-2014

Wolf Pack 1-20-2014

I’ve gotten a lot more stitched since I last posted my progress.

Wolf Pack as of March 14, 2014

Wolf Pack as of March 14, 2014

Progress as of April 11, 2014

Wolf Pack as of April 11, 2014.

Wolf Pack as of April 11, 2014.

Progress as of May 19, 2014

Wolf Pack Progress - May 19 2014.

Wolf Pack Progress – May 19 2014

Progress as of June 27, 2014
Wolf #3 is now being stitched!

Wolf Pack Progress as of June 27, 2014

Wolf Pack Progress as of June 27, 2014

Progress as of August 8, 2014

Wolf Pack Progress as of Aug 8

Wolf Pack Progress as of Aug 8

Progress as of August 23 2014

The Wolf Pack

The Wolf Pack

Progress September 26, 2014 – Working on the 4th and final wolf. Thank Goodness there is light at the end of the tunnel.
2014-09-26 08.17.13

I put the final stitches in last night. Or at least I thought they were the final stitches. After taking the picture, I realized that I forgot the back stitching on the last wolf’s ear. Once it dries, I’ll do that then it will be ready for framing. My son will be very happy to have it hanging in his room.

The Wolf Pack finished 11/18/2014.

The Wolf Pack finished 11/18/2014

February 10, 2015 – Finished and framed. Right now it is only pinned to the foam core. I still need to lace it and add the spacers and glass.

The Wolf Pack framed.

The Wolf Pack framed

The frame I used is from Graphic Dimensions – EWC8 Black Frame EconoWood Classics Collection.

Filed Under: Pictures

Christmas Ornament Finishing Techniques

December 19, 2013 By patgeary

Many of us love stitching Christmas ornaments for our own trees or to give as gifts. I am always on the lookout for new and creative ways to finish them off. For those of you who might be interested, here are two sites I found that have excellent tutorials on the various ways you might want to finish off those ornaments:

Special Shaped Ornament Finishing and Tips from The Twisted Stitcher

Illustrated Index to Finishing Tutorials from Pinwheel Ponders

Below are just a couple of my own finished ornaments.

ginberbreadgirl

cardinal

primrosedamsel

Filed Under: Christmas Ornaments

Hearts and Holly Sampler

November 3, 2013 By patgeary

The Hearts and Holly Sampler is from the Pat Rogers’ Counted Collection of cross stitch charts. It was published in 1994 and is, I imagine, out of print. You may be able to find copies of the chart of eBay or Amazon. The design is stitched in shades of red and green with gold highlights. I framed the finished piece in a brushed gold frame with green mat.

christmas-sampler-framed

Hearts & Holly Sampler


Filed Under: Samplers

  • « Previous Page
  • 1
  • …
  • 33
  • 34
  • 35
  • 36
  • Next Page »
Blackbird Designs Addict.

Recent Posts

  • Beautiful Things
  • Stitching Quaker
  • The Sweet Birds Sing
  • Gifts of the Season
  • St. Patrick’s Day by Primrose Cottage

Categories

  • Blackbird Design News
  • Box Toppers
  • Christmas Ornaments
  • Drums
  • Finished Works
  • Ladies Prim Society
  • Miscellaneous
  • News
  • Pictures
  • Projects to Stitch
  • Samplers
  • Small Finishes
  • Strawberries
  • Tips
  • Tutorials
  • Victorian Motto Sampler Shoppe
  • Wall Hangings
  • Wish List
  • Works In Progress (WIP's)

Counted XStitch Designers

  • Blackbird Designs
  • Country Cottage Needleworks
  • Crossed Wing Collection
  • Little House Needleworks
  • Lizzie Kate
  • Shepherd's Busch Fine Needlework
  • The Prairie Schooler

Favorite Links

  • 123 Stitch
  • Graphik Dimensions
  • Rensel Studio – Custom Picture Framers
  • Victorian Motto Sampler Shoppe

Fine Art Cross Stitch

  • Kustom Kraft
  • Scarlet Quince

Finishing Techniques

  • Framing Cross Stitch
  • Home Framing: Lace Method Tutorial
  • Make a Greeting Card
  • No Sew Wall Hanging
  • Pinwheel Ponders Finishing Techniques
  • Special Shaped Ornaments Finishing from The Twisted Stitcher

Hand Dyed Fabric

  • Enchanting Lair
  • Hand Dyed fabrics by Stephanie
  • Picture This Plus
  • Under the Sea Fabrics

My Other Sites

  • Expression Web Tutorials, & Templates
  • Family Genealogy
  • Genealogy Web Creations

Tutorials

  • Blending Colors
  • Joining Two Pieces of Fabric

WordPress Links

  • Documentation
  • Plugins
  • Support Forum
  • Themes

Administration

  • Log in
  • Entries feed
  • Comments feed
  • WordPress.org

Header Image

The header image at the top is Rainbow Row in Charleston SC. The chart itself is a design by Barbara and Cheryl. You can view the finished piece Rainbow Row.

Subscribe to Blog via Email

Enter your email address to subscribe to this blog and receive notifications of new posts by email.

Join 103 other subscribers

Copyright © 2025 · News Pro Theme On Genesis Framework · WordPress · Log in