• Site Map
  • Contact Me
  • About Me

Pat's Cross-Stitch Corner

A Place to Share a Craft I Love

Top Ten Ways to Personalize Patterns

May 6, 2023 By patgeary

The Colorado Cross Stitcher offered this article in her last newsletter. Some of them I have done and some I have not. She also shares some visuals of these on her FlossTube Channel linked below.

(182) Flosstube #39: Summer Camp, Projects, and Personalizing – YouTube

1. Add your name or initials and date.
2. Add a relative’s name, birthplace, dates. (This one I do quite often when stitching samplers or smalls.
3. Change the colors of some of the motifs to match your decor.
4. Replace motifs that you don’t care for with ones that you love.
5. Lighten or darken some (or all!) of the floss colors.
6. Change the called-for fabric to a different color. (This one I do most often as I don’t stitch on linen and I select lighter color fabrics.)
7. Stitch parts from patterns instead of thinking you need to stitch the whole thing.
8. Stitch multiple patterns from a series into one big piece.
9. Add names of cities you’ve lived in, pets you’ve had, friends that are special, addresses where you have lived, etc.
10. Stitch family initials (in sampler alphabets) in a different color. (Special thanks to Daleen from Sew Grateful for this tip, which I continue to use in my stitching!)
Filed Under: Tips

Library Pockets for Cross Stitch

December 10, 2021 By patgeary

I have to give another stitcher, Anna Williamson, the credit for this marvelous idea.

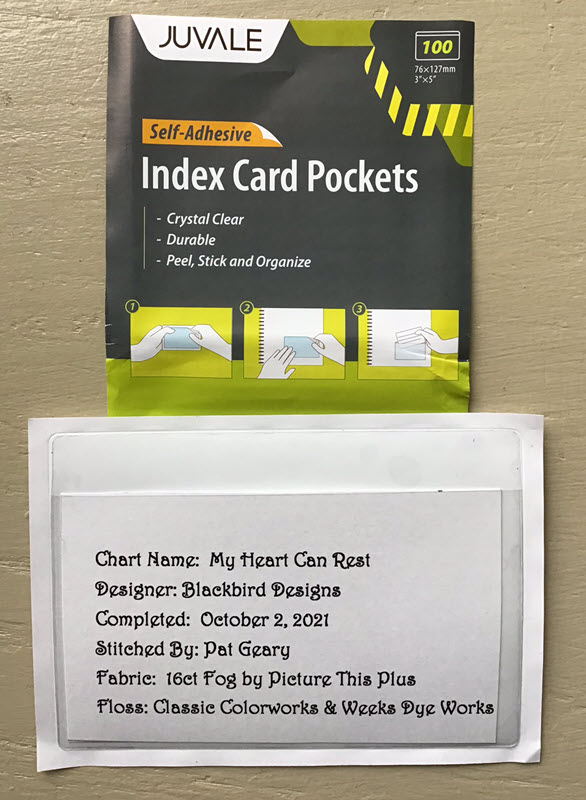
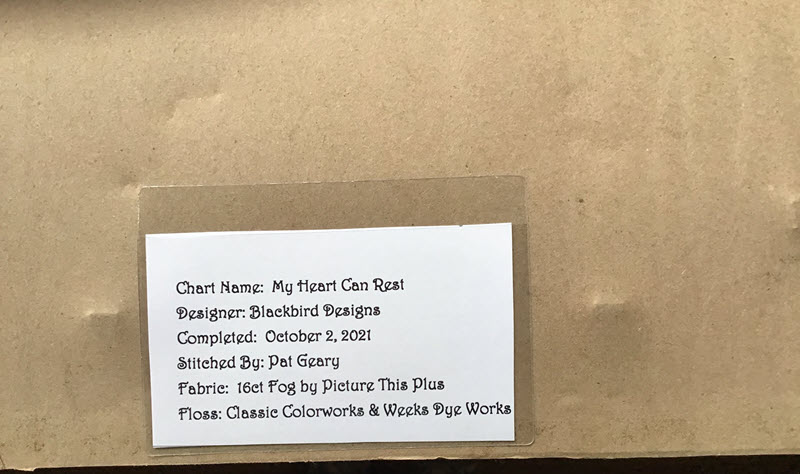
I wanted to find some way to provide some history on the samplers I stitch in case someone is interested after I pass (probably won’t be but it’s a positive thought). I found some 3 x 5 adhesive pockets and some printable 3 x 5 index cards to print information about all of my framed pieces. The pockets can be attached to the back where they can’t be seen if it’s a piece submitted for judging.

I checked on Amazon and found just what I was looking for so ordered them – Juvale 3×5 self-adhesive Index Card Pockets. Rather than order the Printable 3×5 index card sheets, I created a Word document using a table with four cells and margins that made each cell approximately 3×5.

All you have to do is peel off the backing and add it to the back of your stitched piece. You could also the person you would like the piece to go to once you depart this Earth.

Filed Under: Tips

Documenting Your Stitching Projects

October 31, 2018 By patgeary

A link to this article was recently posted in one of the Facebook stitching groups I am a member of. I thought it was worth sharing.

“The following article was written by Debi Feyh of Nordic Needle and published in their weekly e-mail newsletter. Permission was granted by Nordic Needle to share this article in (Pat’s Cross Stitch Corner). For information on subscribing to their weekly e-mail newsletter, visit www.nordicneedle.com.
A free mail-order catalog is available to you upon request if you live in the USA or Canada.”

Should I include a signature?

Historically, sampler designs often included the stitcher’s name or initials and the year it was completed. Many famous stitchers included their signature on their needlework including Mary Queen of Scots. In addition, artisans in other media usually sign or mark their artwork.

What should my signature include?

This is a personal choice, one that artists struggle with even today. Here are some of the options to consider:

  • Your initials (2 or 3), possibly worked into a monogram.
  • First name & last initial, first initial & full last name, or full name.
  • Design a personal logo which you can work into the piece. Potters often use a special symbol to sign their work. James Whistler, the painter known for such works as Whistler’s Mother, used a stylized butterfly as his signature. The butterfly design changed over the course of his painting, which also provides a time frame for when the painting was done.

TIP: If you come up with a logo or signature you like, then graph it so you don’t have to reinvent the wheel each time

What if I am single, gotten divorced, or remarried, how should I sign my pieces?

One of the best answers I found was to sign your first name on the front and then include something on the back that includes your full name (at that time) and the date. This helps people identify your pieces over time.

How should you write the date?

You should always use all 4 digits of the year. Many of our textiles are being preserved and it is possible to have work from 1810, 1910 and 2010 but if the piece says ’10 it can be an arguing point.

Where should I put my signature?

  • Keep in mind how you are going to finish the piece so that your signature isn’t cut off or hidden by the finishing.
  • You don’t have to sign or stitch your name in the lower right hand corner. Find a place in the design and use a slightly darker or lighter thread color so that it blends in.
  • Perhaps there isn’t a good place for your signature. You can purchase personalized handiwork labels which can be tacked on to the back of your piece. Be sure to add the date with permanent ink before you attach it to your piece.
  • Create your own personal label on a separate piece of cloth and attach it to your piece, like the quilt labels.
  • If you do sign your work, it is suggested to use the same technique that the piece is done in. However, sometimes it is not possible for needle workers to stitch their signature in the design. You could sign your work with permanent ink, such as Elaine Keller from Candle in the Cellar does. Be sure to test your pen on a scrap of the fabric before you try writing it on the finished piece!
  • A trend in the art community is to sign the front but include more information on the back like the painting’s name, full artist’s signature, date, special artist’s symbol AND a fingerprint!! Pretty hard to argue with the fingerprint when it comes down to whether it is a forgery or not.

What if it is a piece from a pattern?

There are several thoughts on whether or not you should sign a piece that is stitched from a pattern or a kit. One of the prevailing thoughts is that most of us put our own twist on the design. Another idea is that it is okay as long as you aren’t selling your work. (That’s a whole other copyright issue.) I would suggest a compromise by signing your name but on the label or documentation list the pattern name and designer. That shows you are not taking credit for the design only the execution of it.

You can read the entire article, Documentation on the Nordic Needle website.

Filed Under: Tips

Unraveling the Secrets of the Pull Skein

September 29, 2015 By patgeary

If you have ever wondered why your embroidery floss pull skeins end up in a knotted mess? Here are some tips for pulling the right end of the floss brought to you by Mary Corbet.

All this talk about embroidery floss organization lately has raised some good questions from fellow stitchers, from newbies and experienced alike.

One recurring question has to do with the embroidery floss pull skein, and how to pull thread successfully from the pull skein without having to wrestle a knotted clump of embroidery floss to the ground to subdue it. 

Read Unraveling the Secrets of the Pull Skein

Filed Under: Tips

Photo to Cross Stitch

February 28, 2015 By patgeary

Quite often in the various cross stitch forums, the question comes up on how to convert a photo to cross stitch. The one that is recommended most often – and is free – is PIC 2 PAT

In three simple steps you will transform a picture into a beautiful cross stitch chart. The chart can be downloaded to your computer where you can print and store it. If you want to print the pattern again at a later date, there is no need to go to the website again, because the design is stored on locally on your computer.

So let’s get started.

Step 1: Select the photo you want to use. Pic 2 Pat can process almost all image formats. The maximum file size is 4 MB. By pressing the Browse button, you can browse through your pictures (on your computer) to find the correct file. For this example, I am going to use a color photo of my husband taken on his 100th birthday.

jim-geary

Click the Next button and your image will be loaded to the server.

Step 2: Pic 2 Pat can generate cross stitch patterns from a few inches to several feet. Select your preferences for the brand of the floss you want to use (DMC, Anchor, Madeira, or Venus), the stitch count, and the desired size.

I chose DMC, 16 stitches per inch, and 5.7 by 8 inches.  Click the next button.

Step 3:  After pressing the Next button, Pic 2 Pat will show you a number of cross stitch patterns. You can select the pattern which best matches your wishes. The pictures are shown with the most colors used first down to the least number of colors used. In the case of the above image, I was offered 20 some pictures to choose from. The first one used 79 different colors, the last one used only 6 colors. I selected the one that used 79 colors.

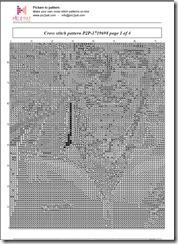
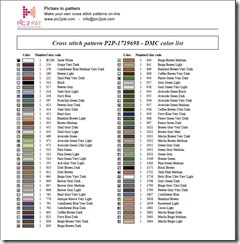
You will be given the opportunity to save the chart to your computer. The chart will include a color picture, the actual chart, and the color list of floss you will need.

pc2patlg-chart
The color picture converted to cross stitch

jjg-chart
The actual chart for stitching

color-key
Color Key for stitching.

All that is left is to select your fabric, gather your threads and begin stitching. Check out PIC 2 PAT and give it a try.

Filed Under: Tips

DMC Merged Colors

August 22, 2014 By patgeary

I subscribe to the Scarlet Quince Newsletter and this was in the edition I just received. I am going to post it here mainly so I can find it again:

In 2005, DMC "merged" some of their color numbers in Europe. Changes in their dye formulas caused by evolving regulations and restrictions on chemicals used in dying meant that 7 pairs of colors had become so close together as to be indistinguishable. For each pair of colors, they discontinued one of the numbers and printed both numbers on the label of the other. Up until now, all 14 separate color numbers have been available in the US, but now the new labeling is going into effect in the US. Here are the colors in question:

Discontinued Substitute
504 3813
731 732
776 3326
781 782
806 3760
971 740
3773 407

You can read the full article and see an example of the new labeling in the Scarlet Quince Newsletter.

Filed Under: Tips

Frogging

April 1, 2014 By patgeary

I had never heard the term “frogging” before joining the 123Stitch Message Board. Of course I have done a lot of it in the years I have been cross stitching! Frogging is what a lot of needle workers call removing stitches because they say "rip it, rip it" and sound like a frog! Most times when I have to do some ripping out of stitches it is only a few stitches. But on one occasion, while stitching this cardinal, I had to take out all the stitches for one wing because I had used the wrong color for a symbol. It was not an easy task and I did not really have the proper tools for doing it. But I had too much time invested in stitching the red bird to throw it out and start again. Below are some suggestions for tools you might find helpful if you have a visit from the frog!

Tools

Stitch Fixer

A Stitch Fixer has a tapestry needle in one end and a bent point on the other end. Use both ends to remove stitches, anchor thread ends, repair finished works, adjust stitch tension, tidy backs of stitching, repair snags, weave ribbons, and lay silk fibers. See Needlework Tool: Thread-Tucker-Tweaker-Fixer-Thingy

Snip A Stitch scissors

I bought a pair of Snip A Stitch scissors for my Mom one time and they have been a big help. Not sure what brand mine are. The hooked blade easily picks up stitches for clipping without danger of damaging fabric. Others recommend Gingher scissors.

Stitch Blade

The Stitch Blade has a razor sharp surgical steel blade cuts threads or yarns without pulling. Tip slides easily under a single stitch while blunt outer edges protect fabric or canvas.

Judy’s Boo Boo Stick

Judy’s Boo Boo Stick is linen and even-weave friendly – By dragging clipped floss out the back of the fabric, the positioning of the fabric threads are not dislodged and the delicate fibers are not frayed. For a demonstration of how to use it view Judy’s Boo Stick Video Tutorial.

One of the ladies on the MB today said she had made a "Frog Box" for herself.

I got one of those little pink Sew-lutions boxes by Art Bin from Joann’s (with a coupon–the cost is outrageous). In this (labeled, of course) box are my thread plucking tweezers, a "stitch blade", some "stitch fixers" in several sizes, a Star DeTailor, a Boo-Boo Stick, a toothbrush (had to saw 3/4" off the handle so it’d fit in the box), and a pair of stitch remover scissors.

It seemed like every time the Frog came to visit, I’d have to locate all this stuff for my ripping session. So, in the interest of efficiency and organization, I made the Frog Box. Works for me. At first I called it "Repair Tools", but that wasn’t as cool as "Frog Box".

This is the article that inspired me to write this post – Needle Delights Originals Tips on Frogging. I hope the frog does not come to visit while you are stitching.

Filed Under: Tips

Blackbird Designs Addict.

Recent Posts

  • Beautiful Things
  • Stitching Quaker
  • The Sweet Birds Sing
  • Gifts of the Season
  • St. Patrick’s Day by Primrose Cottage

Categories

  • Blackbird Design News
  • Box Toppers
  • Christmas Ornaments
  • Drums
  • Finished Works
  • Ladies Prim Society
  • Miscellaneous
  • News
  • Pictures
  • Projects to Stitch
  • Samplers
  • Small Finishes
  • Strawberries
  • Tips
  • Tutorials
  • Victorian Motto Sampler Shoppe
  • Wall Hangings
  • Wish List
  • Works In Progress (WIP's)

Counted XStitch Designers

  • Blackbird Designs
  • Country Cottage Needleworks
  • Crossed Wing Collection
  • Little House Needleworks
  • Lizzie Kate
  • Shepherd's Busch Fine Needlework
  • The Prairie Schooler

Favorite Links

  • 123 Stitch
  • Graphik Dimensions
  • Rensel Studio – Custom Picture Framers
  • Victorian Motto Sampler Shoppe

Fine Art Cross Stitch

  • Kustom Kraft
  • Scarlet Quince

Finishing Techniques

  • Framing Cross Stitch
  • Home Framing: Lace Method Tutorial
  • Make a Greeting Card
  • No Sew Wall Hanging
  • Pinwheel Ponders Finishing Techniques
  • Special Shaped Ornaments Finishing from The Twisted Stitcher

Hand Dyed Fabric

  • Enchanting Lair
  • Hand Dyed fabrics by Stephanie
  • Picture This Plus
  • Under the Sea Fabrics

My Other Sites

  • Expression Web Tutorials, & Templates
  • Family Genealogy
  • Genealogy Web Creations

Tutorials

  • Blending Colors
  • Joining Two Pieces of Fabric

WordPress Links

  • Documentation
  • Plugins
  • Support Forum
  • Themes

Administration

  • Log in
  • Entries feed
  • Comments feed
  • WordPress.org

Header Image

The header image at the top is Rainbow Row in Charleston SC. The chart itself is a design by Barbara and Cheryl. You can view the finished piece Rainbow Row.

Subscribe to Blog via Email

Enter your email address to subscribe to this blog and receive notifications of new posts by email.

Join 103 other subscribers

Copyright © 2025 · News Pro Theme On Genesis Framework · WordPress · Log in